|
Nintendo DSi is a Nintendo-manufactured handheld console that was announced on October 2, 2008 and first released in Japan on November 1 of the same year. The majority of the store bought games for it were initially released exclusively for the Nintendo DS and DS Lite. Nevertheless, it includes a plethora of exclusive features and has an exclusive library of downloadable and retail games. The features are listed below.
Components
Front (while open)
The Nintendo DSi has two backlit color liquid crystal screens that have five adjustable brightness settings. The lower screen is touch sensitive and is suggested that it only be used with a Nintendo DSi stylus. Besides the upper screen are two stereo speakers, and on the lower part of the upper segment are three LED indicators. The left most indicator is the Wireless Indicator LED, which shines yellow if the player has the wireless communications enabled, and will blink in a pattern when the player is in the process of communicating wirelessly. The middle one is the Recharge Indicator LED, which will shine orange when the Nintendo DSi is being charged. Once the light is no longer charged with the AC Adapter still appropriately placed, it indicates that the Nintendo DSi is fully charged. When the Nintendo DSi is turned on, the light may not turn off even if it is charged, though either way it is not a malfunction. When the middle light is blinking, it indicates that the battery isn't properly placed. The right most one is called the Power Indicator LED, and it tells the player the status of the battery. When blue, the battery is between 25%-100% charged, when red the battery life is low, and when blinking it indicates that the Nintendo DSi will soon turn off. When the Nintendo DSi is closed and the Power Indicator LED is blinking, it means that the system is in sleep mode. The brightness of the two screens will also determine the brightness of the LED Indicators.
In the middle of the Nintendo DSi is the inner camera, and next to that is the mic, which is used in a variety of ways to record vocal data or blow into the microphone for various video games that use this feature. On the lower half of the system are the control components including the d-pad, the A (right), B (bottom), Y (left), and X (top) buttons, and the start and select buttons. The power button, which is placed below the d-pad, turns the system on and off. Quickly pressing the power button will reset the console though won't turn it off, while holding it will turn the system off. On the side of the Nintendo DSi is the SD Card Slot, which can be opened by gently exerting force on it. Putting too much force on it can damage it to the point where it cannot be inserted into the slot properly.
Back (while open)
On the upper half of the back of the Nintendo DSi is the outer camera, and next to it is the Camera Indicator LED which shines pink when the outer camera is in use. If you close the Nintendo DSi while the outer camera is in use the light will turn off. Unlike the inner LED Indicators (outer when the Nintendo DSi is shut), the outer camera indicator will not change brightness when the player changes the brightness of the Nintendo DSi's screens. On the side of the system is the volume/screen brightness control which has two buttons labeled + and -. Pressing on the + button will increase the screen's volume, while pressing - will lower the screen's volume. In order to turn the volume off all the way before turning the system on, the player can hold the - button while pressing power. Holding SELECT and pressing either the + or the - will alter the brightness of the screens. In all there are five different brightness levels, and changing the brightness will effect the battery life as follows:
- Highest setting: 3-4 hours
- High setting: 4-6 hours
- Medium setting: 6-9 hours
- Low setting: 8-12 hours
- Lowest setting: 9-14 hours
Take note that this is under normal conditions. After charging the battery 500 times, it is expected that the battery life will decrease by 30% to when it was purchased brand new. When playing wirelessly or connected to the internet, or when using the cameras, this also will decrease the amount of time until a battery runs out of power. Certain events in games may consume more power than other events as well, especially saving a game.
Next to the SD Card slot is the Nintendo DSi stylus holder. Only styluses that are made specifically for the Nintendo DSi should be placed in the holder, as previous Nintendo DS systems' styluses are different sizes. In the middle of the Nintendo DSi where the two halves are connected are the L and R buttons at the ends (indicating Left and Right, respectively). Together they're known as the shoulder buttons, and are used primarily in games and applications, though can be used in conjunction with the power button to head directly to the touch screen calibration in system settings if the touch screen isn't acting properly. Directly in the middle is the DS Game Card Slot, which holds Nintendo DS and Nintendo DSi game cards. Next to the slot are the wrist strap attachment and the AC Adapter Connector.
Features
Nintendo DSi Menu

A normal DSi menu.
After turning the Nintendo DSi on and getting past the health and safety warning, the user will automatically enter the Nintendo DSi Menu. On the Nintendo DSi Menu are icons of applications on the bottom screen, while an image and various other information will be found on the top. Pressing the R or L button while on the Nintendo DSi Menu will bring the Nintendo DSi into camera mode so that the player can quickly take pictures.
The icons on the bottom screen can be moved by touching and dragging it up to the center of the screen or by pressing the up button on the d-pad and moving it where ever they'd like by movng the d-pad left and right and then put the application in the desired spot by pressing the down button. (where the application's name and publisher are found). Following this, players can navigate the bottom screen and find a new location for the application.
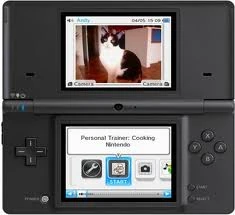
The top screen features the photo display, which takes one of the existing photos in the user's gallery and places it on the top screen. Using the Nintendo DSi Camera application, you can choose which photos will be showcased on the upper screen. If more than one image is chosen, then the image will change after closing and opening the Nintendo DSi. Also featured on the top screen is the volume level, the user's name, the date, the time of the day, and the battery level.
Nintendo DSi Camera
The Nintendo DSi Camera can be accessed by pressing the camera icon on the Nintendo DSi Menu. The Nintendo DSi has two cameras, one on the inside and one on the outside. The camera has twelve different lenses, some of which are meant to be less serious than others. After taking a picture, it will be displayed either in the album or the SD Card. In the album the player is allowed to place stickers on the images to label them and to choose which images will be displayed on the Nintendo DSi Menu as well as Upload to Facebook.
Nintendo DSi Sound
Nintendo DSi Sound allows the user to record sounds. The player is also allowed to play with their own music if it's on an SD Card. It can be accessed by pressing the parakeet icon on the Nintendo DSi Menu. After recording a sound, the player can keep it by pressing one of the colors that are displayed (the colors are meant to differentiate the sounds). Following this, the player can alter the speed and sound of it, adding filters to make it sound funny.
Nintendo DSi Shop
The Nintendo DSi Shop is similar to the Wii Shop Channel in that you can purchase applications and games made for the Nintendo DSi. Most of the applications available are through DSiWare, a service that provides games made exclusively for the Nintendo DSi. Games that aren't free can be purchased by using a credit card or Nintendo Point Card.
DS Download Play
DS Download Play allows players to play multiplayer enabled games wirelessly. Some games require that the all players involved have a card, while others don't. Some games will allow everyone to play with just one card though also remove certain features to those without the card (example: in Mario Kart DS, those that don't have a card are required to play as Shy Guy).
PictoChat
PictoChat is a returning feature from the original Nintendo DS and DS Lite. With it, up to sixteen players can chat with each other in close quarters. Like in the original, there are four different rooms. Very little has changed with the Nintendo DSi version, though by pressing the draw icon the player can create rainbow colored lines instead of just black lines as was the case in the original.
System Settings
In System Settings, the user is able to alter various aspects of the Nintendo DSi. There are four pages in System Settings. The player can navigate the pages by pressing the arrow on the screen (the color of the arrows changes depending on the color the player chooses in "profile"). On the top screen is the player's ID, which contains his or her name, their chosen color, and their birthday. Also on the top screen is the version of the Nintendo DSi. The available options in System Settings are:
Page 1
- Data Management: Copy or delete removable applications from the system memory or an SD Card. The amount of 128k blocks each application takes up is also displayed here.
- Wireless Communications: Lets you turn the system's wireless communications on or off.
- Brightness Settings: Alter the brightness of the screen. This can also be done by holding the select button and pressing up or down on the volume button.
Page 2
- Profile: Change the user's user name (can only be ten characters long), message (can only be twenty six characters long), color (choose from sixteen colors) and birthday.
- Date: Change the date.
- Time: Change the time.
- Alarm: Set the alarm (military time). When the time comes, the sound of the alarm will gradually increase (it reaches its highest sound after thirteen seconds). On the top screen, it shows the current time, when the alarm is set for, and how much time is left until the alarm goes off. Once the alarm goes off, the latter will be replaced by how much time has elapsed. On the bottom screen is an image of a clock with eyes (that look left and right) and a mustache. After one minute, the alarm will stop ringing.
Page 3
- Parental Controls: With Parental Controls, the user can restrict the access to certain Nintendo DSiWare games and content (Nintendo DS games are not compatible with Parental Controls), PictoChat, DS Download Play, Nintendo DSi Browser, Nintendo DSi Shop, Photo Exchange, and user-generated content.
- Touch Screen: Calibrate your Nintendo DSi's touch screen by following the on screen instructions.
- Mic Test: Speak into the mic to test the mic's sensitivity.
- Internet: Set up the internet by following the on screen instructions.
Page 4
- Language: Change your system's language. The possible languages differ depending on the country.
- Country: Change the country. The list of countries available depends on the country of the Nintendo DSi's origin.
- System Update: Check online to see if there are any new system updates for the Nintendo DSi.
- Format System Memory: Erase all of the system's memory and return it to the condition it was when the Nintendo DSi was first purchased.
Nintendo DSi XL
On October 21, 2009 Nintendo released a Nintendo DSi with bigger 4.2" screens, which is known as the Nintendo DSi XL. (or LL in Japan) This DSi was then released outside of Japan on April 15, 2010. The interface stays the same.
Development
The official Nintendo DSi logo.
Days before the handheld was announced, a news report was released in Japan revealing the console, much to Nintendo's dismay. They proceeded on, however, neither confirming or denying the claims, which stated some of the primary features of the system. On October 2, 2008, Nintendo announced during a Japanese press conference the DSi, and reported all the news revealed on their official website, which Nintendo themselves later translated into English. The next day in America the DSi wasn't a major topic since it was confirmed that it wouldn't be released until well into 2009. However, Nintendo of America announced that the DSi would be released in North America on April 5, 2009. Australia will get the DSi available on April 2, 2009 and in Europe on April 3, 2009. The "i" in the name represents the two cameras and the console's individuality. Nintendo explains that the cameras give the DS a third human sense; whereas the original DS gave it touch (touch screen) and hearing (mic), the camera gives it sight.
Beginnings
Nintendo started planning a new DS (which was a long time before they thought of the DSi) in 2006 after the release of the DS Lite (the first Nintendo DS redesign). The designers at the Developing Engineering Department had to create a proposal for their boss and the rest of Nintendo by the end of December of that year, a hefty task to take on at such a short notice. One of the major problems while developing the new piece of hardware was the fact the fact that it really wasn't a new piece of hardware, and that selling it would be a challenge since a host of new games wouldn't be released alongside it. Nevertheless, they pushed on, fortunately with the knowledge that they had already done a similar feat with the DS Lite. Another dilemma was figuring out how to be innovative while still being restrained by the features of the previous Nintendo DS models.
The Cameras
The first new feature that they decided on was the cameras. They speculated whether they should have two cameras, one on the inside looking at you and one on the outside or a swivel that had a camera on it that could turn so you could change the position of it. Ultimately they decided to choose two cameras since the swivel would increase the cost of the handheld. It was also found that swivels break easily, according to Nintendo president Satoru Iwata.
The next thing they had to come up with was the pixel count of the two cameras. Ultimately they decided to settle on 0.3-megapixel cameras. While considerably less than high profile cameras, Nintendo explained this peculiar route. One of the problems was that a higher pixel count would require a larger DSi, and Nintendo was dead set on creating an accessible system that wasn't clunky. It would also increase the processing load and the amount of memory in order to save an image, and with the DSi's very limited space this is something that was not needed.
Presenting it
In October of 2007 the development team modeled a version of their new DS and showed it to ten people working within Nintendo's EAD divisions and asked them if the new console was one that they would want to own. Unfortunately for the designers, only three said it looked like a system they wanted to own and seven said it wasn't. One of the system's designers said that the three who said they didn't were probably lying themselves since the people who made it were standing right there (and thus they didn't want to offend them). So, reluctantly though inevitably they had to go back to the drawing board, and had to remove some features from the clunky design they had showcased. One of those things were two separate DS game card slots. In one of the initial designs Nintendo had planned to have two DS slots so that the player could store two games without having to switch them around. However, despite requests by gamers and workers in house, the unit was just too big and they had to be removed. Apparently the extra slot made the unit three millimeters thicker as well and it still wasn't the DSi.
Easter Egg
In the Nintendo DSi Sound application, you have to make a recording and then go to the menu of recording and wait for a minute. After a minute or so is up, you will hear the sound you just recorded in the tune of the Super Mario Bros. theme.
Gallery
")
")
")
")